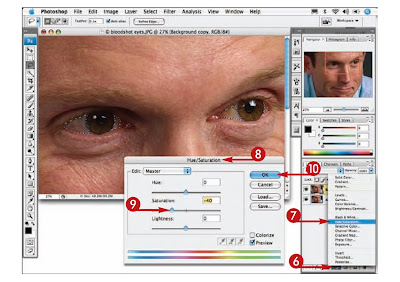
 1 With the Background layerduplicated, click the Zoom tooland zoom in on the eye area.
2 Click the Lasso tool and draw aselection around the white areaof one eye.
3 Press and hold Shift and selectthe other white areas of the eyes.
4 Click Select Modify Feather.
5 Type 3 here and click OK.
 6 Click the Adjustment Layerbutton.
7 Click Hue/Saturation.The Hue/Saturation dialog boxappears.
8 Move the dialog box so that youcan see the eyes.
9 Drag the Saturation slider to theleft to remove the redness.
10 Click OK.
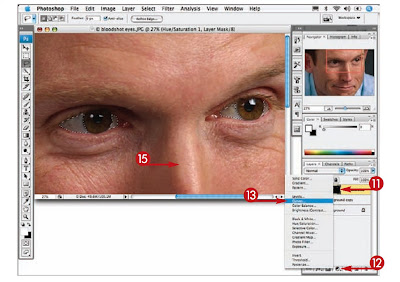
 11 Press (Ctrl+click) the layermask thumbnailtoloadthe selectionagain.
12 Click the AdjustmentLayer button.
13 Click Curves.
14 Click OK in the Curvesdialog box that appearswithout making anychanges.
15 Press Option+spacebar(Alt+spacebar) and clickin the image to zoomout and see the wholeface.
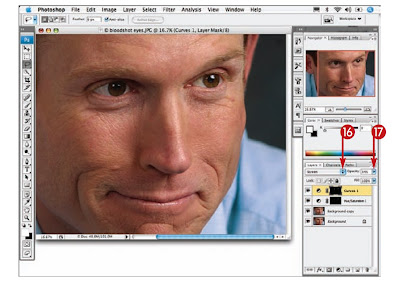
 16 Click here and select Screen.
17 Click here and drag the slider to the leftto reduce the opacity of the layer until theeyes look brighter but still natural.
No comments:
Post a Comment