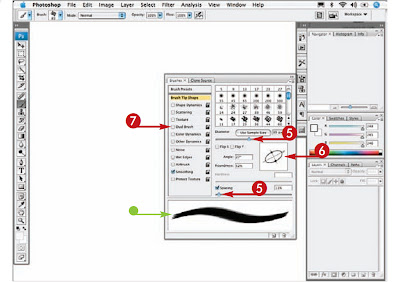
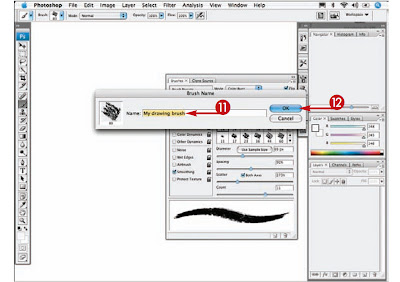
Whether you retouch photographs, design brochures,or paint from scratch, you will use the Brush toolsmany times and in many ways. Selecting the Brushtool from the toolbox opens a variety of brushes inthe drop-down menu on the Options bar.You can modify the size, roundness, or otherattributes of any of the existing brushes to suit yourdrawing style or your image. You can then save themodified brush as your own custom brush so that itis ready to use for your next design.A number of other tools also have modifiable brushoptions, including the Pencil tool, the Eraser tool, theClone Stamp tool, the Pattern Stamp tool, the HistoryBrush, the Art History Brush, the Blur tool, theSharpen tool, the Smudge tool, the Dodge tool, theBurn tool, and the Sponge tool.Customizing Brush tools for your projects is atimesaving technique, and it is fun. You may findyourself experimenting with all types of brushes.
 1 Click the Brush tool.
2 Click the Brushes button to openthe Brushes palette.
3 Click the preset brush that youwant to modify into a custombrush.
4 Click Brush Tip Shape.


No comments:
Post a Comment