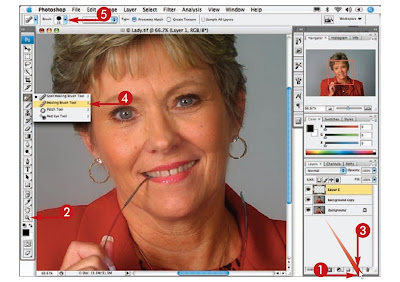
 1 Click and drag the Backgroundlayer thumbnail over the NewLayer icon to duplicate the layer.
2 Click the Zoom tool and zoominto enlarge the areas withwrinkles.
3 Click here to add a new emptylayer.
4 Click and hold the Spot HealingBrush tool and select the HealingBrush.
5 Click here to open the BrushPicker.
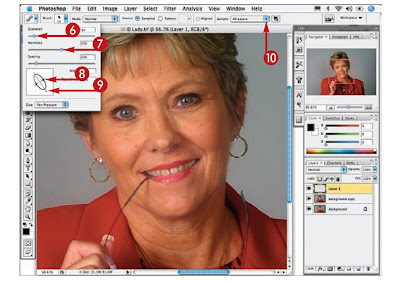
 6 Set the Master Diameter slidertoa brush size wide enough tocover the deepest wrinkles.
7 Drag the Hardness slider toabout 50 percent.
8 Click one dot on the circle in thethumbnail and drag toward thecenter to change the roundnessof the brush.
9 Drag the arrowhead to changethe angle of the stroke in thedirection of the deepest wrinkles.
10 Click here and select All Layers.
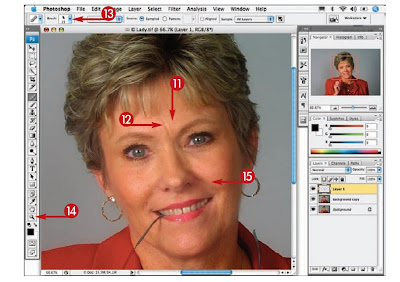
 11 Press Option+click(Alt+click) an area ofclear skin near onewrinkle to sample.
12 Click and drag directlyon the first wrinkles topaint them away.
13 Click here and repeatsteps 8 to 12, changingthe brush angle androundness for the otherwrinkles.
14 Click the Zoom tool.
15 Press Option (Alt) andclick in the image tozoom out.
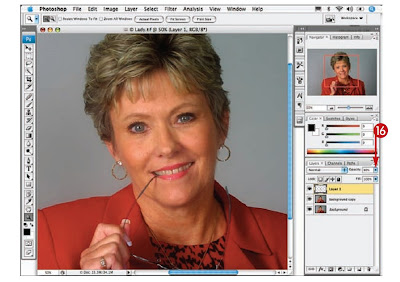
 16 With the top layer selected, click here anddrag the slider until the wrinkles appeardiminished and still natural.
No comments:
Post a Comment